
Customise your workspace
Rename a workspace, give it an icon and colour, create new workspaces, and choose a theme for everyone or just for you.
The workspace switcher at the top of the sidebar lists every workspace you belong to. Select one to switch to it. The same menu is where you rename, restyle and create workspaces.
Rename a workspace or change its icon
- Open the workspace switcher at the top of the sidebar.
- Choose Customize current.
- Edit the Workspace name.
- Pick an icon from the Emoji or Icon tab, or use Upload to add your own image, such as a client's logo. Choose a colour for it too.
- Select Save.
Everyone in the workspace sees the new name and icon, and so do visitors on its public links.
Create a new workspace
- Open the workspace switcher and choose New workspace.
- Give it a Workspace name, and optionally an icon and colour.
- Select Create.
Each workspace has its own members, files and plan. On Seedling you can own one free workspace. If you already have one, you'll see You've used your free workspace, with the option to create the new one on a paid plan instead (Choose a plan for it). Paid workspaces aren't limited in number, and each is billed on its own. Workspaces you've been invited into don't count towards your free one. See plans and limits.
Choose a theme
- Open the account menu at the bottom of the sidebar and choose Appearance.
- Pick a theme: Light, Dark, Dracula, Nord, Solarized Light, Rosé Pine or Treehouse (the default).
- Save it in one of two ways:
- Set as default makes it the theme everyone in this workspace sees, including visitors on its public links.
- Use for me applies it only for you, in this browser, for this workspace.
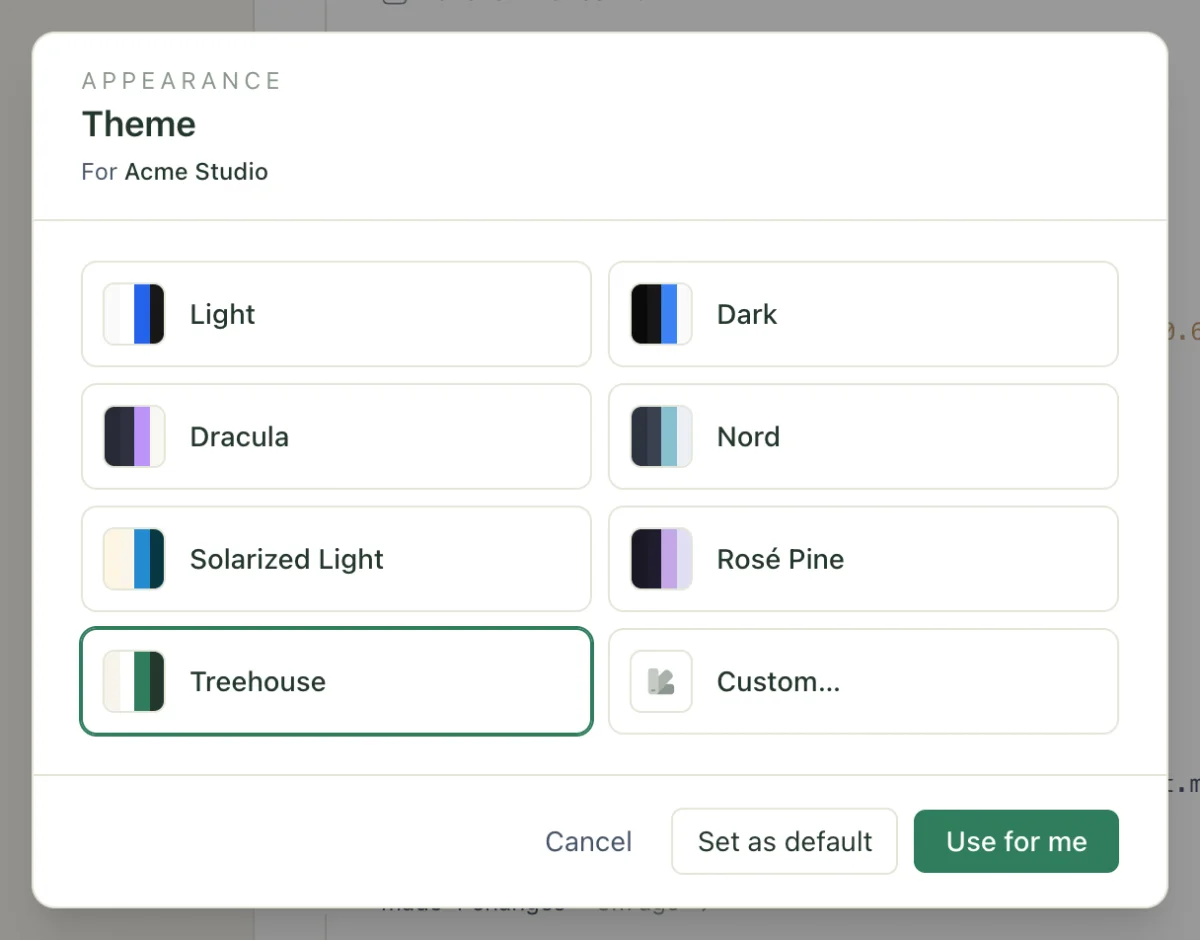
Themes are per workspace, which is a handy way to tell workspaces apart at a glance. The theme doesn't follow your computer's light or dark mode: pick the one you want.
Make your own theme
- In Appearance, choose Custom….
- Set each of the 14 colours with the colour pickers. They cover backgrounds, text, borders, the accent colour, status colours for success, warnings and danger, and the Agent and Human colours used to mark who made each change in Activity.
- If you prefer, select Edit raw CSS and paste
--th-*variables directly. Any you leave out fall back to the default theme. - Select Set as default or Use for me.
Related
- Plans and limits
What Seedling, Grove and Forest include, how usage is counted, and what happens when a workspace reaches a limit.
- Share a file or folder with a link
Send members straight to a file, or give anyone read-only access to a file or folder, with an optional password and a pinned version.
Last updated